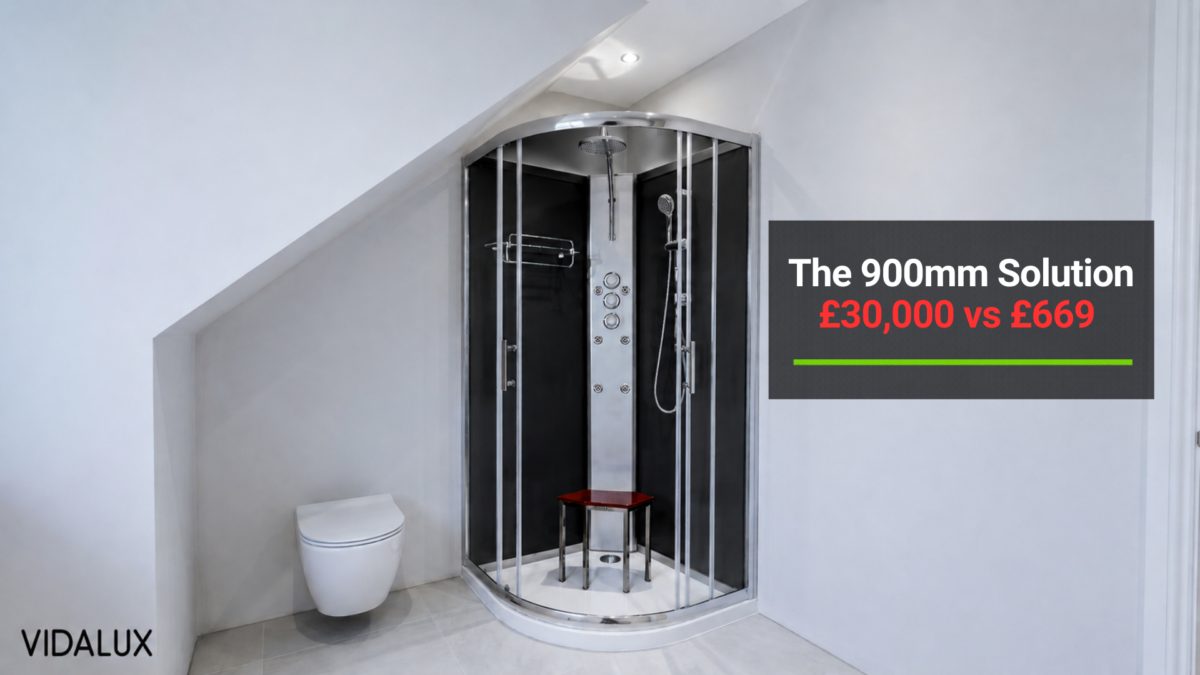
The 900mm Solution: How to Fit a Full Spa into a Downstairs Cloakroom
A bathroom company quoted £30,000 for labour alone to put a shower in a downstairs cloakroom. Another quote came in at £5,000. The trades were equally qualified. The difference wasn’t skill – it was whether the install needed to fight the building or work with it.
That gap is where most homeowners give up. A small corner shower in a downstairs cloakroom feels like a sensible idea right up until the surveyor walks in, looks at the floor, and starts shaking their head about the soil pipe.
Here’s the thing. The downstairs cloakroom is the most underused room in a typical UK home. Turning it into a working second wet area is genuinely possible. But only if you understand the four engineering questions that decide everything before you commission a single trade.
The Real Question Isn’t “Will It Fit?”
Most homeowners ask if there’s enough floor space. That’s the wrong question.
A shower will physically fit in nearly any cloakroom over about 900mm square. The harder question is whether the room’s existing structure can carry a shower without major surgery. Four checks decide that.
Floor type. Concrete or timber. A concrete ground floor makes a level-access wet room nearly impossible without raising the whole floor build-up. Timber gives you options – waste pipes can route between joists, and floors can take a tray with minimal disruption.
Soil stack distance. How far is the shower’s waste exit from your existing 110mm soil pipe? Beyond about 6m, gravity drainage starts to need careful planning, with adequate fall and minimal bends.
Ceiling clearance. Cloakrooms have unusual heights, especially under stairs. Most enclosed shower units need a minimum of 2,300 mm from the finished floor to the ceiling.
Ventilation. No opening window means a mechanical extractor fan is mandatory under building regulations. Not optional, not negotiable.
If three of those four work in your favour, you almost certainly have a viable conversion. If the floor is timber and the soil stack is close, you’re probably looking at a one-week job, not a four-week one.
What Building Regs Actually Require
Adding a shower to an existing cloakroom is governed by Building Regulations – not planning permission, in the vast majority of cases. The compliance points are clear, and worth knowing before you take a single quote.
Part F (Ventilation). A new shower room requires extract ventilation with a minimum flow rate of 8 litres per second continuous, or 15 litres per second intermittent. According to Approved Document F on gov.uk, this applies to any new bathroom, shower room, utility room, or toilet. If there’s no opening window, mechanical extraction is the only compliant route.
Part G (Sanitation). Sets the rules for hot water safety and drainage, including the requirement that WC waste connects directly to the drain via a 110mm soil stack.
Part P (Electrical). Bathroom zones 0, 1, and 2 dictate what electrical equipment can go where. All bathroom circuits need RCD protection. This is the qualified electrician’s job – never a DIY decision.
Fixture clearance. Standard practice is 760mm between fixtures and 510mm clearance in front of the toilet. Tight cloakrooms often fail here before they fail anywhere else.
Worth noting: if your tradesperson is registered with a Competent Person Scheme – NICEIC, NAPIT, or similar – they can self-certify the relevant parts of the work, removing a separate building control application for those elements. Always verify current requirements with the Planning Portal before you commit.
The Drainage Decision That Decides Everything

This is where the £30,000 quotes come from.
If your new shower waste has to travel more than about 6m to reach the soil stack, or your floor is concrete, or your joists run the wrong way, you have three options. Each has a very different price tag.
Option 1: Conventional gravity drainage. Preferred. Cheapest, quietest, most reliable. You need a downhill run with adequate fall and ideally a straightish line to the soil stack. If you can route within roughly 6m, take this option every time.
Option 2: Floor-up reroute. Lift the floor, run new waste pipework, and reinstate. According to professional cost guides, soil pipe rerouting alone can add £2,000 to £3,000 to the bill, before you’ve fitted anything. On a concrete floor, it’s even worse – you’re talking core drilling and structural disruption.
Option 3: Macerator pump. The Saniflo and similar systems pump waste through 22-32mm pipework, vertically up to about 5m or horizontally up to 30m and beyond. They unlock installs that gravity drainage rules out entirely – basements, lofts, and under-stairs spaces. The trade-offs are real: a 15-second running cycle every time the unit fires, the strict “nothing but toilet paper” rule that the whole household has to follow, and external pipework that can freeze in winter if it isn’t insulated and boxed.
But which one is right for a cloakroom shower?
The honest summary, repeated by installers across UK forums, is this: if you can fit a normal waste, it’s better. If you can’t, a macerator is better than not doing the job at all. The decision is structural, not stylistic.
Why a Self-Contained Cabin Changes the Maths
Most quotes assume a traditional install. Tile the walls. Tank the floor with a waterproof membrane. Fit a tray. Install a screen. Bed the tray, screen, and wall junctions in silicone that’s on permanent show.
That sequence is what makes downstairs cloakroom showers expensive – it’s labour-heavy and trade-heavy, with three or four different specialists turning up across a fortnight. It’s also where most failures eventually happen, because the on-show silicone bead is the part that mildews, peels, and needs resealing every few years.
A self-contained shower cabin collapses that sequence into one delivery and one fit.
No tiling required. Solid back panels cover existing decoration. No tile saw, no grout lines, no tiler.
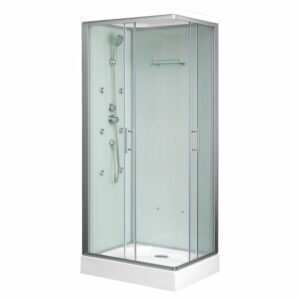
Pre-engineered structure. The walls, tray, and roof arrive engineered as a single unit, not as separate components that your installer has to integrate on-site.
No silicone on show. Sealant is still part of any shower install – that’s standard practice. The difference is where the sealant sits. Vidalux’s leak-seal compression seals and tray return channels are the primary defence against water escape, with sealant placed internally where it isn’t visible. The result is no exposed silicone bead, no mould-prone surface to clean, and no annual resealing.
Predictable footprint. The cabin is the wet zone. There’s no separate splash area to tank, no glass screen to plumb-line, no tray-to-tile junction to seal on the outside.
Faster install. A self-contained cabin typically goes in over 1-2 days. A fully tiled equivalent runs 5-10 days, per current Checkatrade and BestBuilders 2026 cost data.
A self-contained shower cabin is like a flat-pack engineered solution – it arrives ready to fit, where a tiled shower has to be built from raw materials on your floor.
The trade-offs are honest ones. You choose from manufacturer sizes – typically 800, 900, 1,000, or 1,200mm – rather than a fully bespoke layout. The aesthetic is contemporary rather than traditional. For a downstairs cloakroom, where space is tight, and you’d rather not have four trades on site for two weeks, those are usually the right trade-offs.
How the Pure 900 Was Built for This Exact Problem

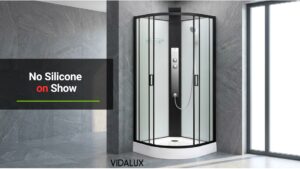
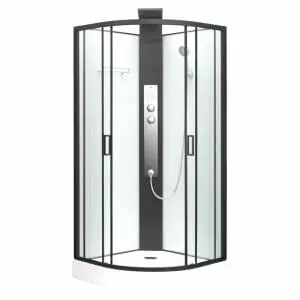
The Pure 900 is a 900 x 900 x 2,300mm quadrant hydro shower cabin from Vidalux’s hydro shower range. It exists to answer the cloakroom-conversion problem without the full-tile install.
What that means in practical terms:
- 900mm corner footprint. Fits in spaces where a rectangular enclosure won’t.
- 2,300mm minimum ceiling clearance. Works under most cloakroom ceilings, including some understairs spaces. Always measure before ordering.
- Easy plumb tray with flexible waste pipe. Adapts to whichever direction your existing waste runs.
- Vernet thermostatic valve. Engineered for combi-boiler households, with a 38°C anti-scald lock as standard.
- Leak-Seal technology. Compression-sealed structure with return channels that redirect any water back into the tray rather than out into the cloakroom floor.
- No silicone on show. Sealant sits internally where it’s hidden, not as an exposed bead. No mould, no peeling, no annual resealing.
- Reinforced acrylic base on a steel frame, with adjustable levelling feet. Copes with uneven floors that would be a disaster for a tiled tray.
The cabin is available in Pure Black or Pure Crystal White, currently priced at £669.00, with a 3-year warranty on registration. Sizing in the same range runs from 800 x 800mm up to 1,200 x 800mm if 900mm doesn’t suit your space. Full specifications are on the Pure 900 product page.
The Vidalux Approach
Vidalux is a UK manufacturer of hydro shower cabins, steam showers, whirlpool baths, saunas, and steam rooms. The Pure range was engineered around a frustration customers kept describing – traditional tiled showers go wrong at the seams, and the seams are exactly where a small bathroom can least afford to fail.
Worth being clear: Vidalux is supply-only. Cabins are sold directly or through retailers, with full installation guides and dedicated technical support, but the install itself is carried out by your own plumber or chosen tradesperson. That keeps the focus on what we do best – engineering a product that an experienced trade can fit cleanly, with the primary leak defence built into the structure rather than relying on an on-show silicone bead.
You’ll find more practical guidance across our hydro shower guides covering everything from sizing to cleaning to installation prep.
Three Measurements Decide Everything
Three numbers tell you whether this project is real or theoretical.
- The distance from your cloakroom waste exit to the existing 110mm soil stack.
- The available ceiling height. The Pure 900 needs a minimum of 2,300 mm.
- The corner footprint. The Pure 900 needs 900 x 900mm; smaller and larger sizes are available in the same range.
Take those three measurements before you book a single quote. If they work, the project is feasible – and almost certainly cheaper, faster, and lower-risk than the fully tiled conversion you may already have been priced for. Review the options. See what fits.
Frequently Asked Questions
Q: Do I need planning permission to put a shower in my downstairs cloakroom? A: Adding a shower to an existing cloakroom typically does not require planning permission. It does require building regulations approval, which covers ventilation, drainage, and electrical work. Always confirm current requirements with your local building control authority or the Planning Portal before starting.
Q: What is the smallest corner shower for a downstairs cloakroom? A: The smallest practical corner shower for a downstairs cloakroom is typically 800 x 800mm, though 900 x 900mm offers noticeably more usable space without significantly increasing the footprint. The Vidalux Pure range starts at 800 x 800mm and runs up to 1,200 x 800mm. Always measure ceiling clearance before ordering.
Q: Can I put a shower in a cloakroom with no window? A: Yes, provided you install a mechanical extractor fan that meets Approved Document F. The minimum extract rate for a new shower room is 8 litres per second continuous, or 15 litres per second intermittent. A registered electrician can install this and self-certify the work.
Q: Is a self-contained shower cabin cheaper than a tiled shower? A: Generally yes. A self-contained cabin removes tiling, grouting, tanking, and external screen sealing from the project. Total install time typically drops from 5-10 days to 1-2 days, and you eliminate the on-show silicone bead that fails first on most traditional installs.
- About the Author
- UK’s best-rated?

With over 22 years in the home spa industry, Andrew has overseen every stage of the journey—from initial product design and manufacturing to final installation. An author of multiple technical publications and scientific papers, he founded Vidalux to replace industry hype with engineering-led reliability. His focus remains on delivering gym-quality wellness through honest design and technical truth.
DISCLAIMER: All specifications, claims, and advice relating to any internal or external procedure, practise, product, or service were true at the time of writing. For more accurate and up-to-date details in relation to Vidalux services, please visit the relevant dedicated on-site page. For any product-related information, specifications, or guidance, the information on the product page should be considered the governing source.
Ready to choose?
Browse the full Vidalux range of saunas, steam showers, baths and shower cabins, all in one place